To Set Up Date and Time
- Right-click Live View → open drop-down menu.
- Click Main Menu.
- Click System.
- Click Date & Time tab.
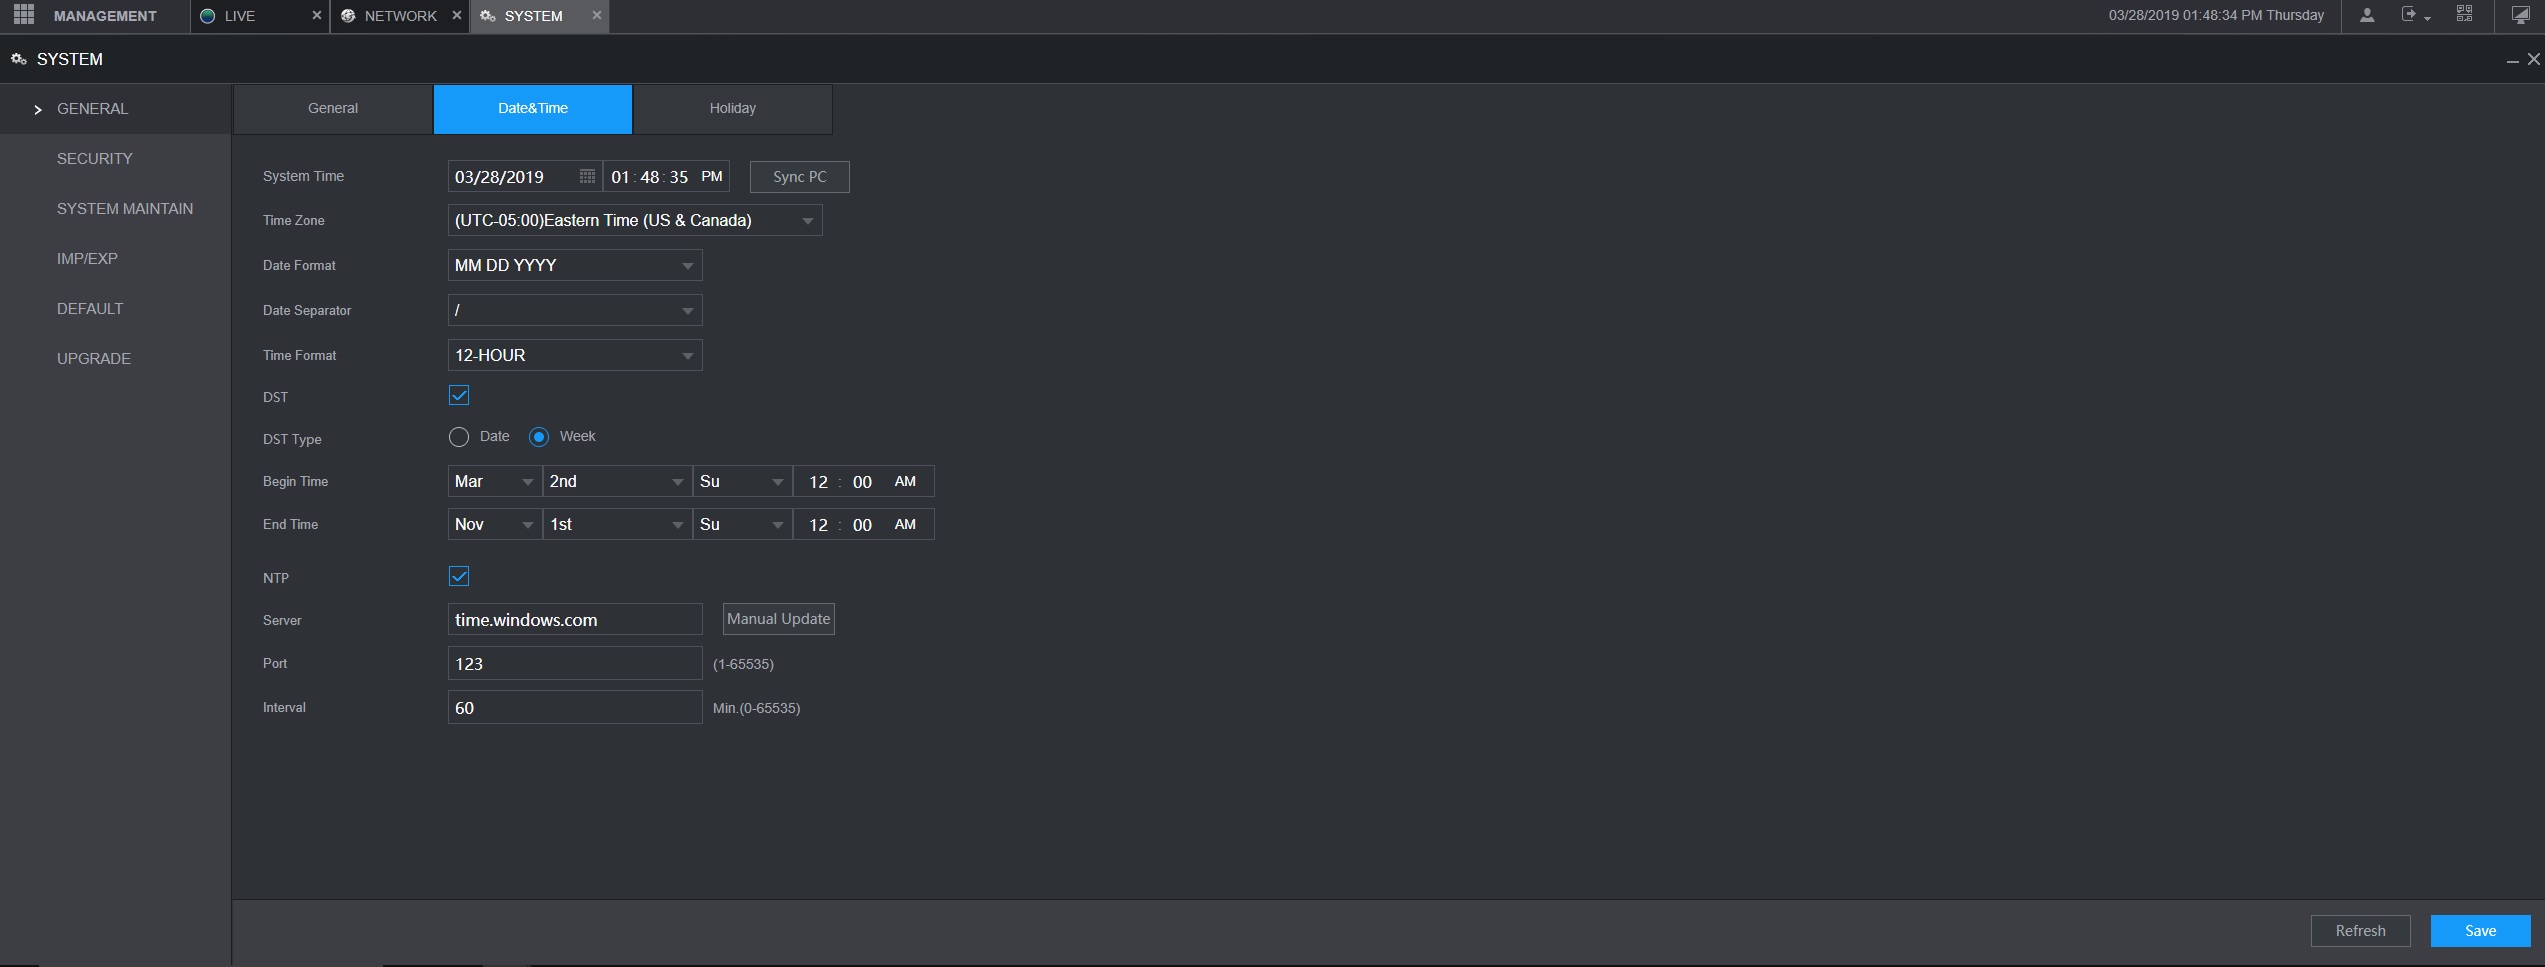
- Set current time and time zone (e.g., GMT-5 for Eastern Time, USA).
- Enable DST if applicable.
- For NTP auto-sync:
- Check NTP box.
- Server:
pool.ntp.org(recommended) ortime.windows.com/time.google.com - Port: 123
- Click Apply/Save.
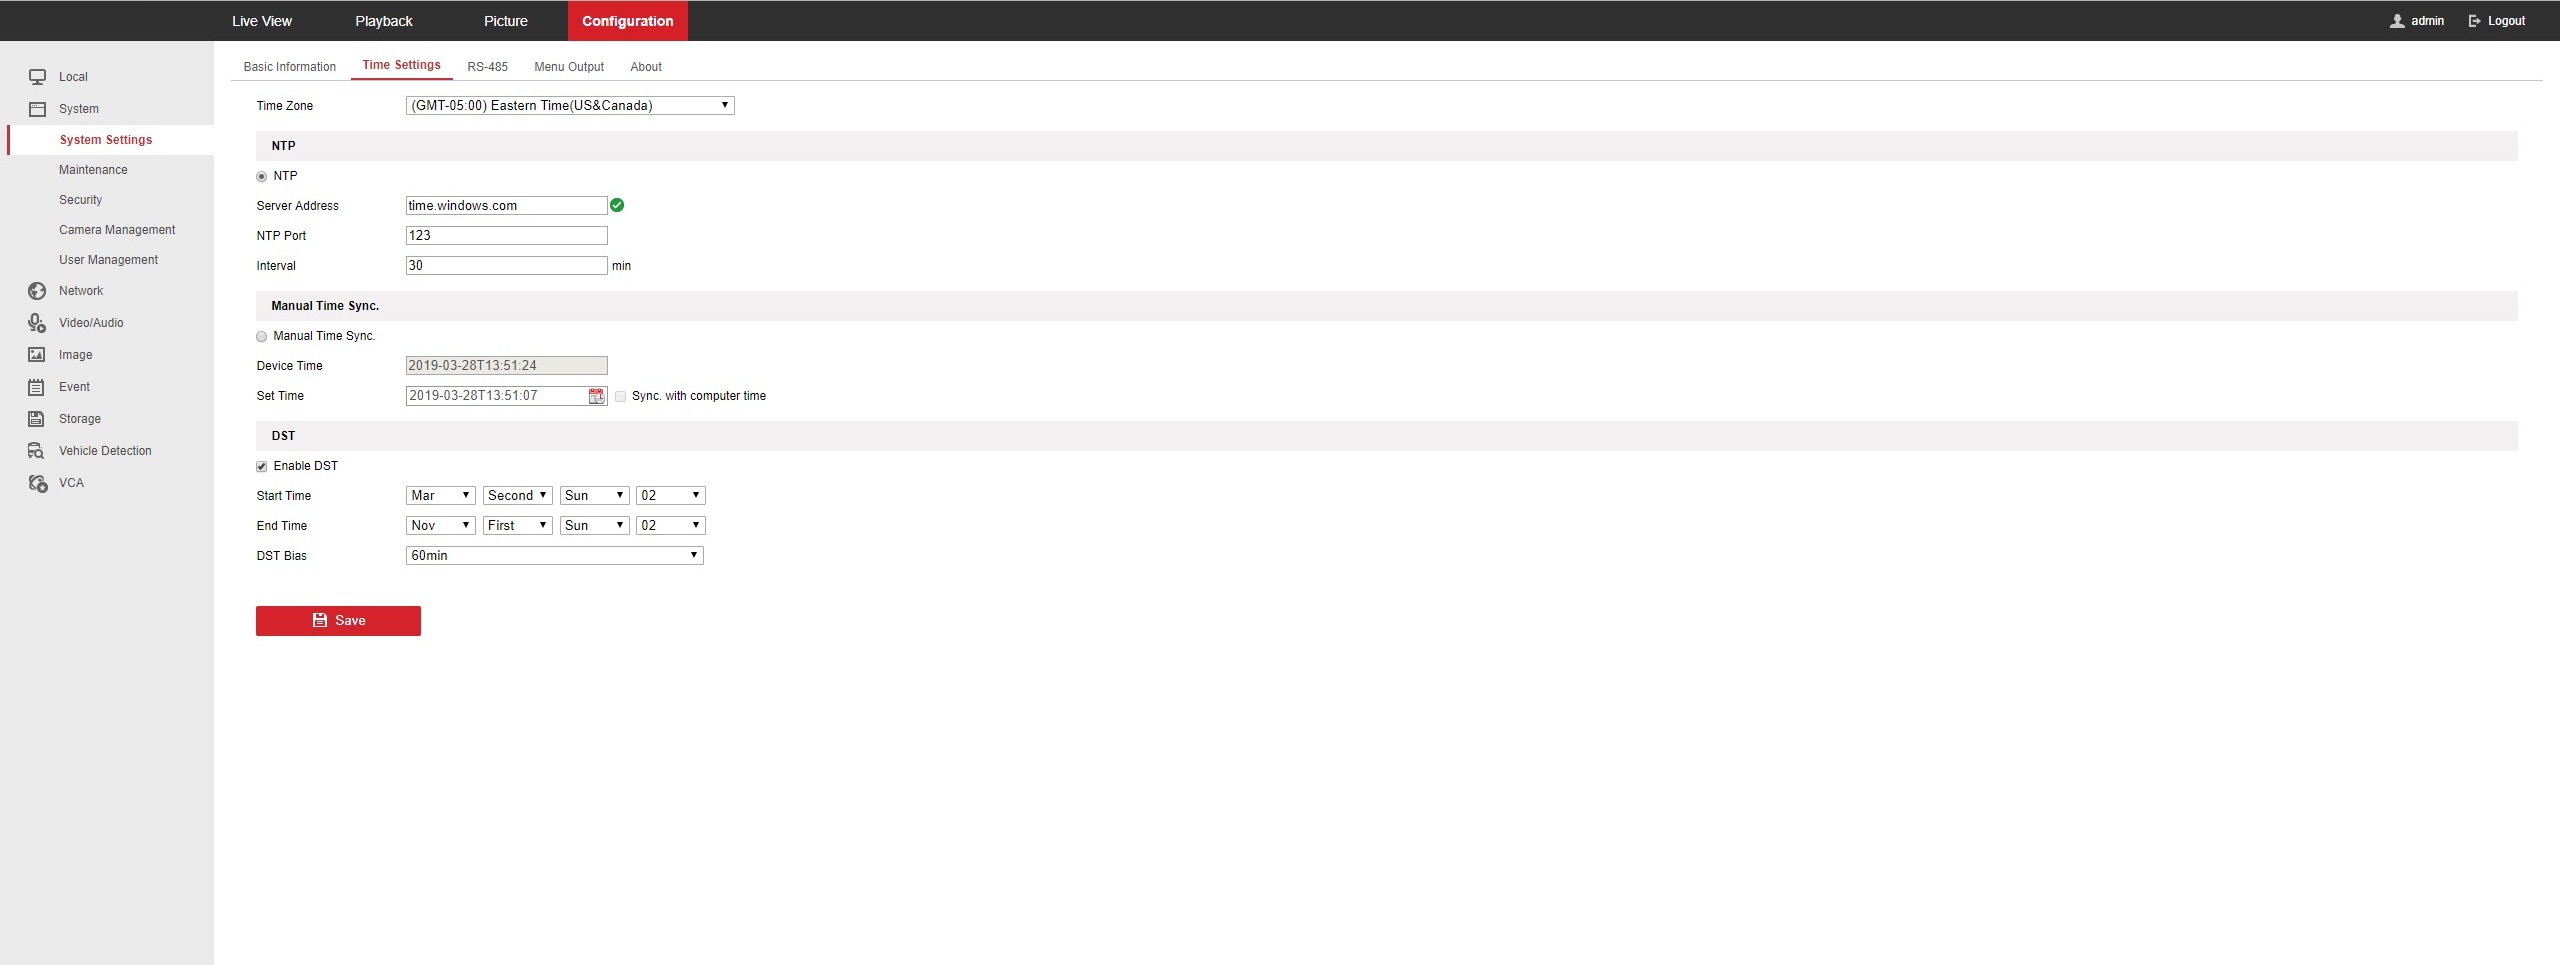
Guarding Vision DVRs: Go to Configuration → System Settings → Date & Time.
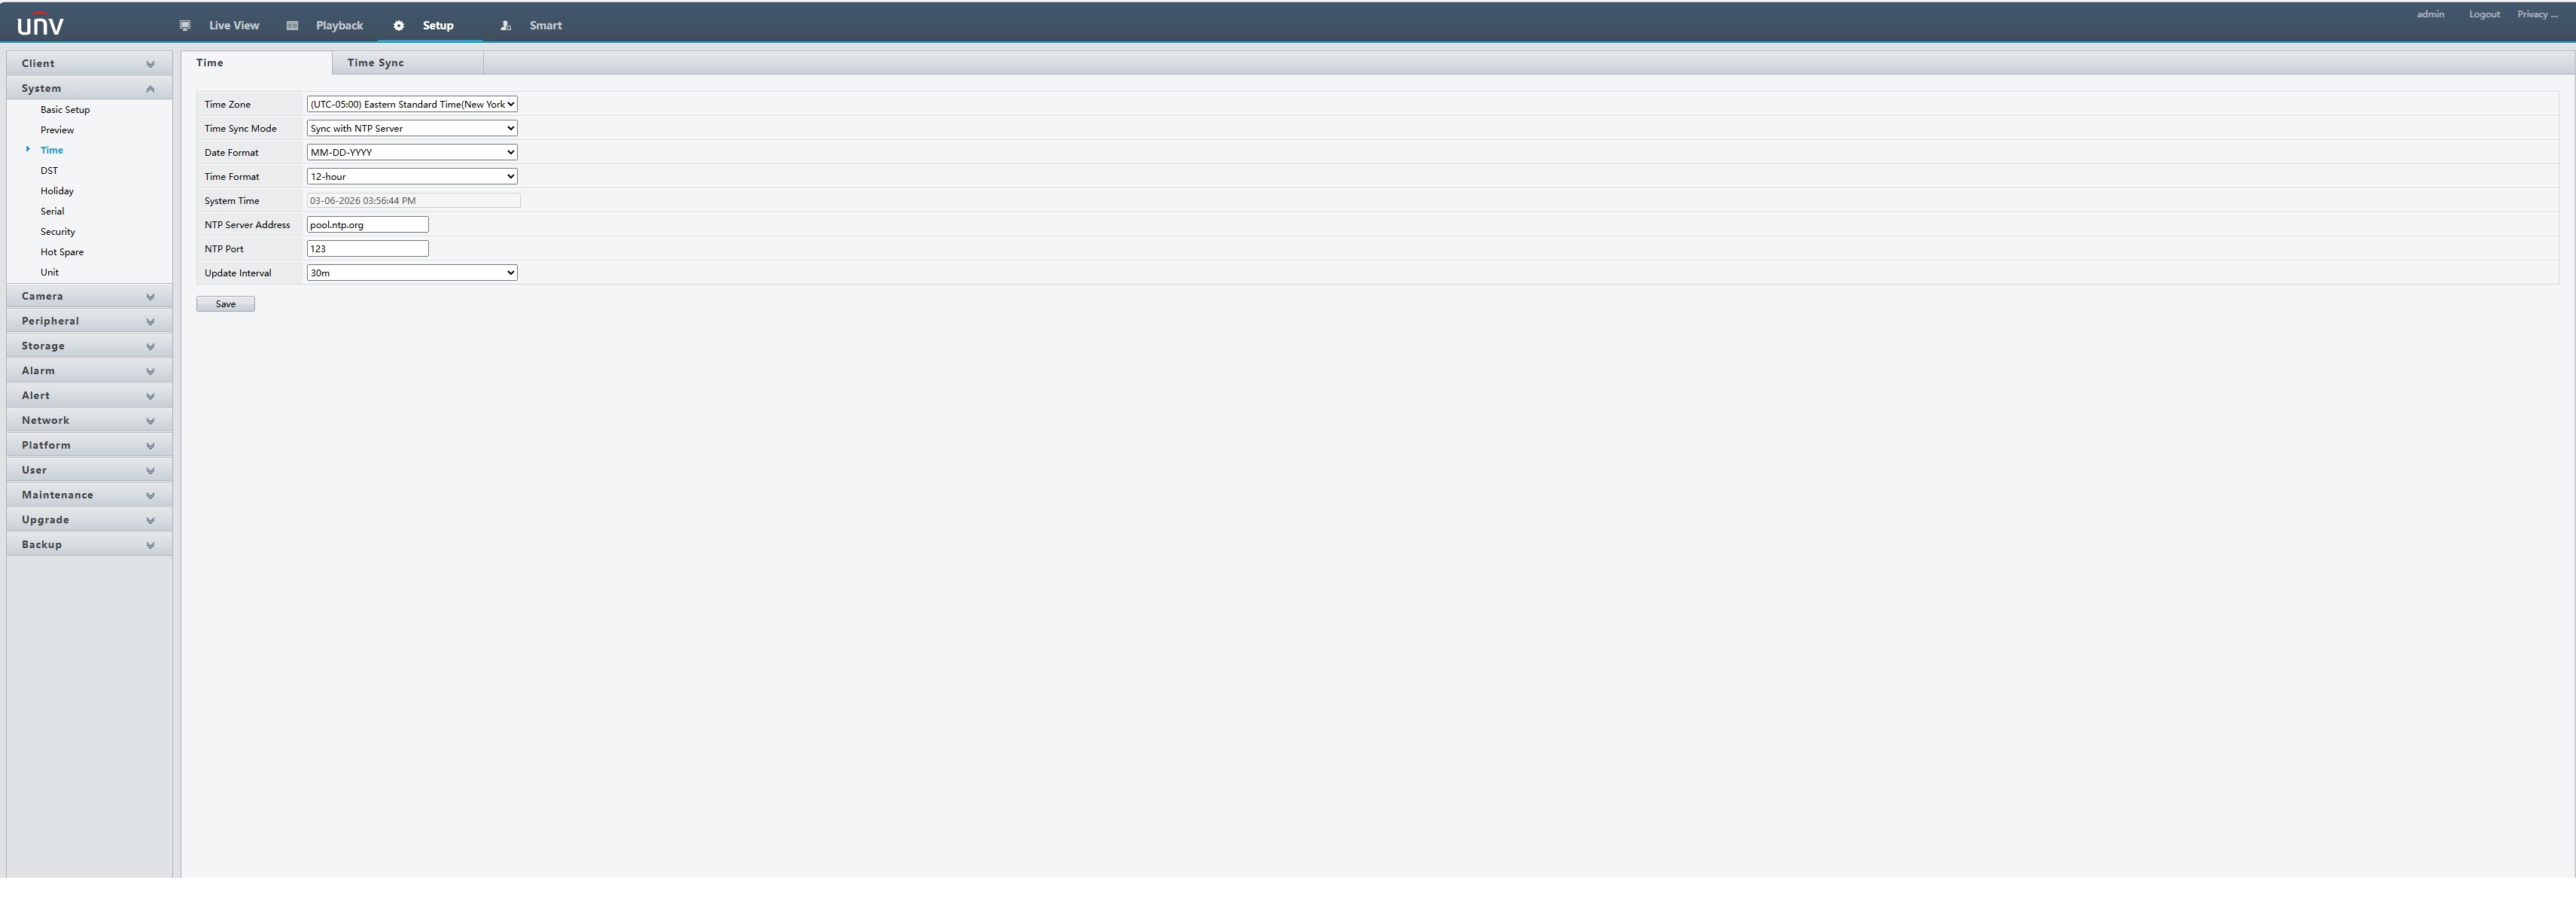
Uniview (UNV) NVRs: Web interface: Setup → System → Time (or local: Menu → System → Time). Enable NTP auto-update. DST: Setup → System → DST.
Troubleshooting Common NTP Errors
- NTP fails to update / "Synchronization failed" / time stays wrong: Confirm internet access (test ping to 8.8.8.8). Try different server (
pool.ntp.orgis most reliable). Check firewall/router allows outbound UDP port 123 (many block it by default). - Time drifts or resets after power loss: Enable NTP and set update interval (e.g., 60–1440 minutes). Replace CMOS battery on older units if time resets on reboot.
- "No server suitable" or connection timeout: Verify correct port (123), no VPN/proxy interference, and DNS working (set DNS to 8.8.8.8 / 8.8.4.4 if needed). Reboot NVR after changes.
- Time correct on NVR but wrong on cameras / app: Ensure cameras sync from NVR (check camera NTP settings or "Sync with NVR"). Reboot cameras or NVR.
- DST not applying correctly: Enable DST checkbox + set correct start/end dates and bias (usually +60 min). Disable/re-enable NTP after changes.
Still not syncing? Check network logs, firmware version (update if outdated), or contact support with error message and device model.