Setting up Internet Explorer to Connect to DVR
Step 1: Open Internet Explorer from your desktop. Now click on Tools – Internet Options when Internet Explorer opens up. In your internet options window click the Security tab. (see below)
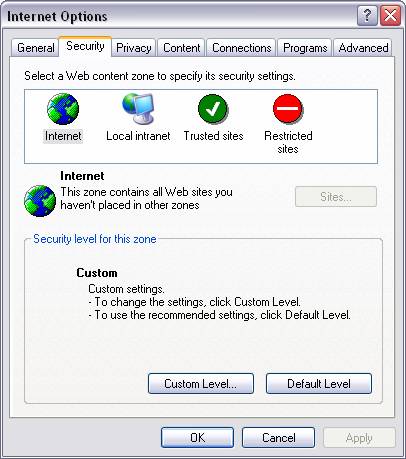
Step 2: the Custom Level button towards the bottom. On the Security Settings window scroll down until you locate: •– Download unsigned ActiveX Controls. •– Initialize and script ActiveX Controls not marked as safe
Check both boxes to Prompt (see below).

Step 7: The IP address/domain name should now be added in the “Websites in Compatibility View” area. Proceed with closing out and restarting Internet Explorer. Please be sure you have exited out of all browser windows before restarting IE.
Step 8: in the address of the DVR as normal and you should see the web interface show as normal.
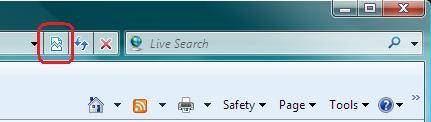
Step 9: You should also be able to turn Compatibility Mode on or off by clicking a small icon located at the end of your main address bar.
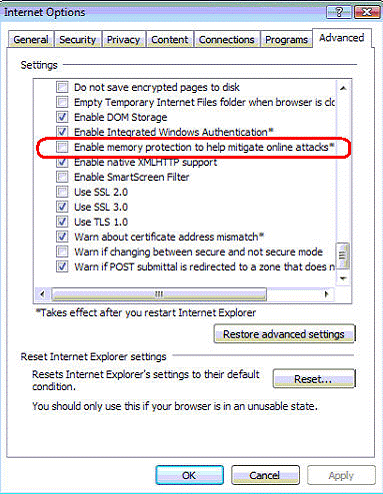
Step 10: Note: If you still cannot access your DVR, you may need to adjust one more setting. Click on Tools, then Internet Options and choose the Advanced tab. Look for an option listed as “Enable memory protection to help mitigate online attacks” (the option is listed towards the bottom). Make sure this option is disabled (un-checked). Once done, click “Apply” at the bottom then “Ok”. Restart Internet Explorer and you should now be able to access the DVRs web interface.